

How To Change Settings In Google Backup And Sync
If y'all're pressed for storage infinite on your PC or Mac, then syncing Google Drive via Backup and Sync can only end upward worsening the situation. Thankfully, you can shift the Google Bulldoze folder to a different location within your computer's internal storage or an external drive whenever y'all desire.
Below, you'll discover three methods that yous tin can use to change the default Google Drive Backup and Sync folder location in Windows and macOS.
The outset method shows how to specify a different folder location while setting upwardly Fill-in and Sync on your PC or Mac. The second and tertiary methods will show how to change the Google Drive folder if you've already begun to sync your Google Drive contents locally.
Method i: Change Google Bulldoze Folder Location During Setup
When you prepare Google Drive Backup and Sync for the first fourth dimension, it volition attempt to set your Google Drive folder under the user account of your PC or Mac past default.
To change that, but select the Alter option (listed next to Folder location) when you get to the Google Drive screen. And then, choice a different folder on your computer. Ideally, the binder should not accept anything in it.
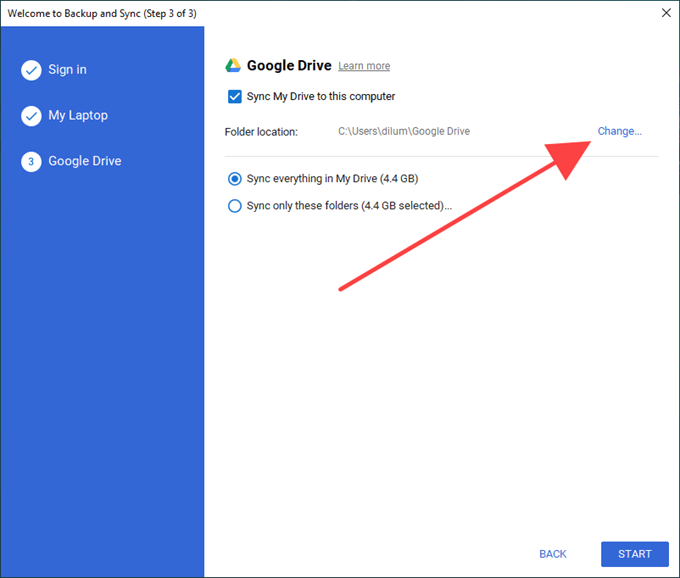
And then, either cull to sync everything in Google Drive locally or select Sync only these folders and pick the items from Google Bulldoze that you want to sync. Finally, select Start.
Method 2: Quit Backup and Sync and Relocate Google Drive Folder
The Fill-in and Sync customer does non let you to change the Google Drive folder location after you've started to sync your Google Drive contents locally.
However, yous tin can use a workaround that involves quitting the Backup and Sync client, shifting the Google Drive binder to a new location, and and so re-opening the sync customer and pointing out the new location.
Not only is information technology easy to perform, just you also don't have to waste material any fourth dimension or bandwidth past having to re-sync your files or folders from the very beginning.
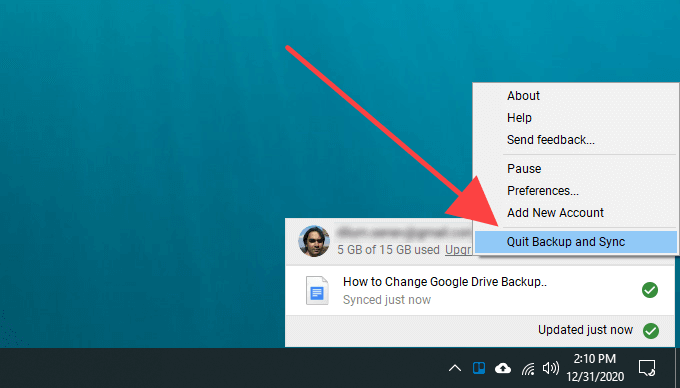
1. Select the Fill-in and Sync from Google icon on the system tray or menu bar. And then, open up the Settings card.
ii. Select Quit Fill-in & Sync and wait for the Backup and Sync client to shut down completely.
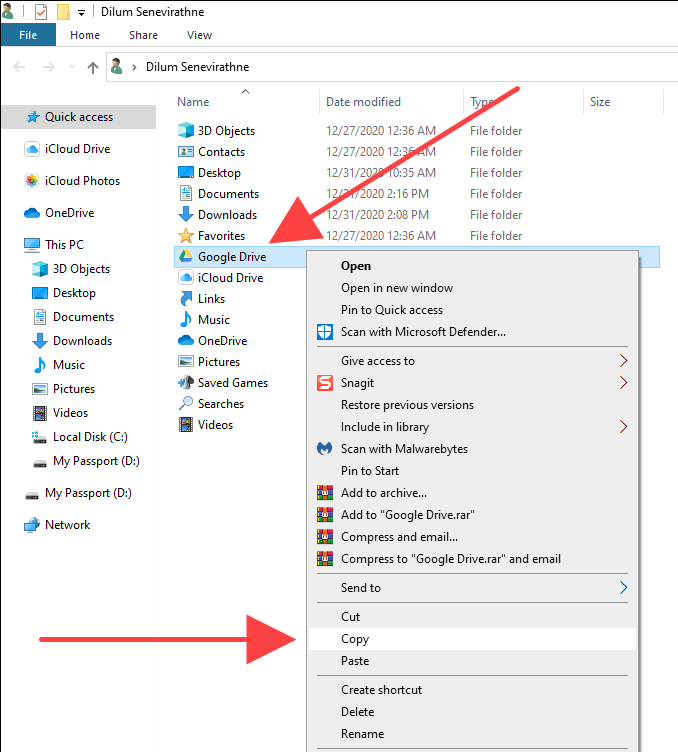
3. Copy the Google Bulldoze binder to the new location.
If you have trouble locating the Google Drive folder, here's how to get to information technology quickly:
Windows: Press Windows+R to open the Run box. And then, type %userprofile% and select OK.
Mac: Open up Finder and select Go > Become to Folder. Then, type ~/ and select Become.
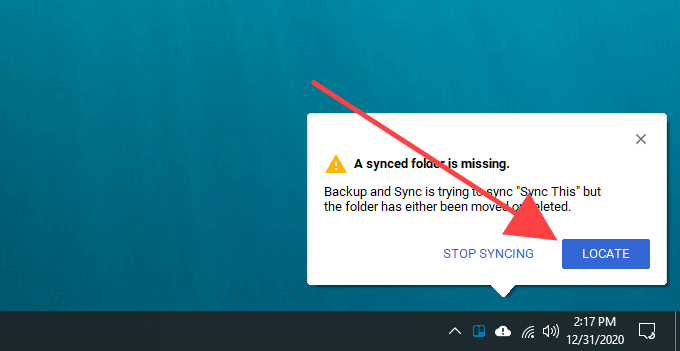
4. Once you're washed copying, delete the Google Drive folder from its original location.
5. Re-open the Fill-in and Sync client. Information technology should ask you to locate the missing binder. Select Locate.
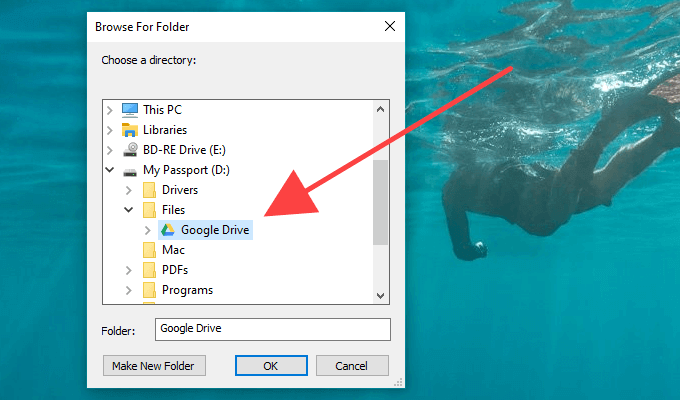
6. Pick the Google Bulldoze binder from the new location and select OK.
7. Select Ostend.
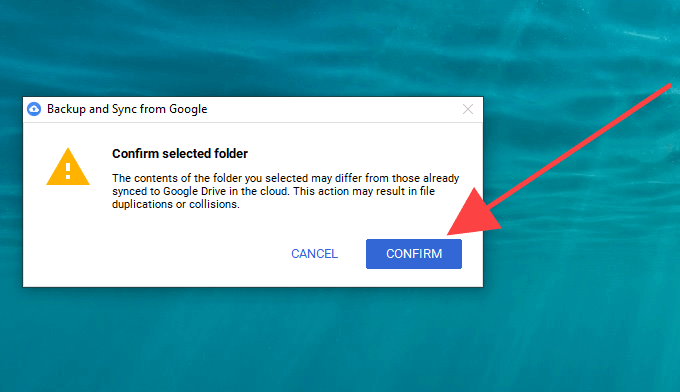
The Backup and Sync client volition then compare the files within the directory to ensure that there'southward nothing amiss. That usually takes a few minutes. You can then get-go using Google Drive normally.
Method 3: Disconnect From Google Account and Reconnect
If you've already started syncing your Google Bulldoze contents to your computer merely want to start all over from scratch with a unlike binder, you lot must disconnect your Google account, sign back into the Backup and Sync client, and re-configure your sync preferences.
You can also choose to move any locally synced Google Drive contents to the new location and merge with them after. But if that's the only thing that you lot want to do, then the method in a higher place is far more convenient.
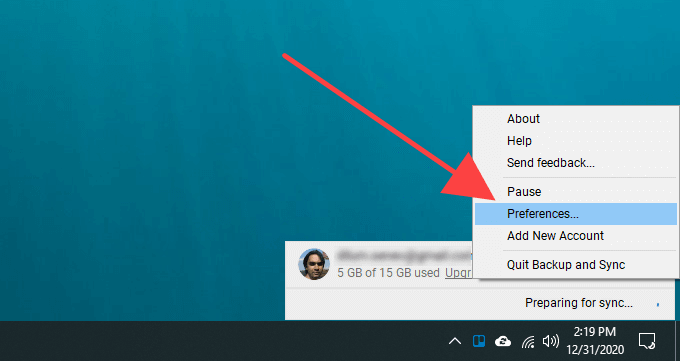
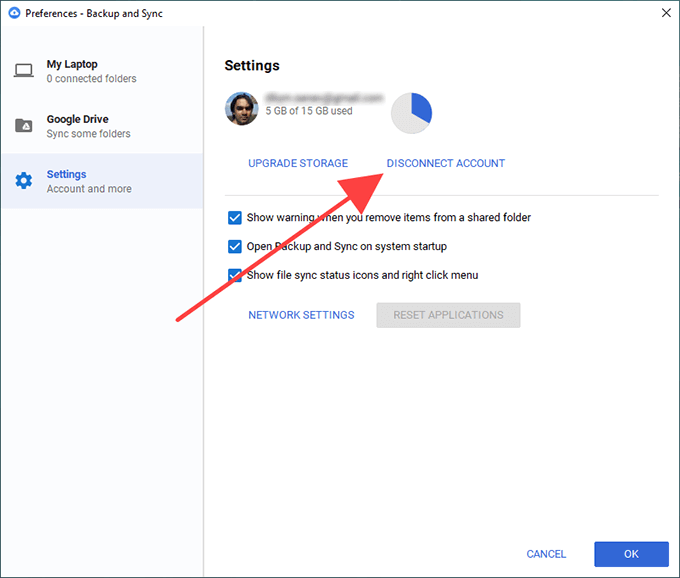
one. Select the Fill-in and Sync from Google icon on the system tray or menu bar. Then, open the Settings menu.
ii. Select Preferences.
three. Switch to the Settings side-tab and select Disconnect Business relationship.
4. Select Disconnect to confirm. Backup and Sync will sign you out of your Google Account. It won't delete any of your locally synced files and folders, however.
v. Move the contents inside the Google Drive folder into a new folder within the location that you want to switch to. Skip this pace if you want to sync everything from scratch.
6. Select Backup and Sync from Google from the organisation tray or menu bar again and select Sign in.
7. Enter your Google Account credentials and set up your sync preferences. Once you get to the Google Bulldoze tab, select Change, and pick the new location.

8. Determine what you want to sync from Google Bulldoze and select Start to begin syncing.
9. If y'all copied whatsoever previously synced files and folders into the new location, select Proceed to merge them with the rest of the contents.
Note: Experience free to delete the Google Drive binder from its original location.
Switched to External Drive? Keep This in Listen
Every bit you just learned, information technology's ridiculously like shooting fish in a barrel to shift the Google Drive folder to a unlike location. If you concluded upward switching to an external drive, however, just remember to keep information technology connected to your PC or Mac to avoid any sync issues. If you do want to remove it, brand sure to exit the Backup and Sync client first. When you reconnect it once more, simply re-open up the sync client to continue syncing as usual.
If yous run into any sync bug later on, hither'south how to fix Google Drive Backup and Sync. Information technology might likewise be a skilful time to optimize your Google Drive storage.
Practice not share my Personal Information.
Source: https://www.online-tech-tips.com/computer-tips/how-to-change-google-drive-backup-and-sync-folder-location/
Posted by: knighteassom.blogspot.com
0 Response to "How To Change Settings In Google Backup And Sync"
Post a Comment